Monday, July 30, 2012

Ultimate Hacking Guide for portable AC Part 3

         Well here we go, converting a single hose 7,000 Btu ac into a duel hose ac...the really really hard way. The problem is this monster has 4 intake vents, 1 water drain plug & I do not want to move the unit around more then once or twice per year. Also I do not have the option to purchase a duel hose 12,000 Btu unit as it is 20" wide and will not fit in the current 15" cabinet space, therefore all the trouble I have to endure to make this work come hell or high water.


Now not only do I have the worlds larges solar cargo trailer but I also have the only duel zone - 2 stage air conditioning, 12,000 Btu - this should keep me cool even up to 105 degrees, "inschallah"  translation if God is willing :-)


Worst comes to worst I'll just need 4 more 245 watt solar panels to keep these monsters running. Hopefully you will never have this much trouble making a small conversion.


Here is the unit LG 7,000 Btu - using 820 watt


Here is the unit LG 7,000 Btu - using 820 watt


This is the original planned location for the ac
right under the bed between the cabinets


This is the rear condensate drain pipe & as I do not want to pull
the unit in every other day, I had to find a 1/2" drain connector,
but they don't sell those Grrrrrrrr !!!


To provide air to the unit required a 4" floor vent through the 1"
thick floor.... MAJOR - Pain in the Butt to drill 


Here is my side vent to provide the air as I could not find a baking pan 
to cover all 4 of the rear vents
Here are 3 x 1" foam carved out in the center


Here are 3 x 1" foam carved out in the center


The 3" foam vent installed next to the ac unit
between the cabinets


The side vent installed and sealed inside the cabinet 
inside view with screws and metal tape


The side vent installed and sealed inside the cabinet 
outside view


4" Floor vent 


Floor vent & connector


Floor vent,  connector & hose


Under floor connector


Under floor connector


Rear exhaust single hose & condensate drain pipe
the ( 2 )  1/2" right side wood shims are very important to press
the ac against the left side foam vent & yet still leave room
if the unit ever needs to be removed


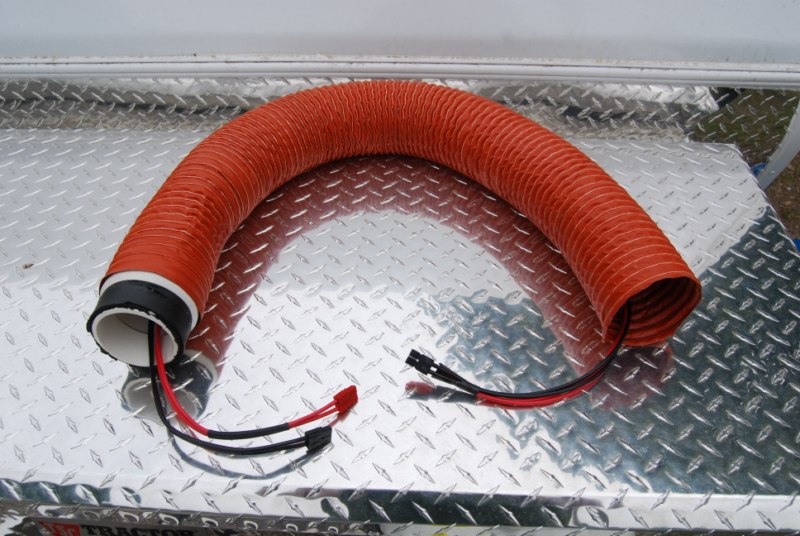
Rear exhaust single hose insulation to be installed


The 2 rear vents were blocked off as all air now comes from the left side


condensate drain pipe - into exhaust hose


View from under the trailer


The 4" blower fan - can provide 240 CFM air flow


Here is the final look , hardly noticeable all the hugh hassle 
that I had to install & convert this unit,
some minor trim work is still to be completed


Stay tuned for the testing results, hot weather permitting :-)


New under floor 3 speed fan - only 50 watts

       If you can remember a long while ago I installed a whole house attic fan on the underside of the trailer. While I can say that this fan generated a lot of airflow it was also made a hell of a lot of noise. I also noticed that while the fan was operating it was sucking about 300 Watts at 120 volts. That's quiet a lot of power by any measure on a cargo trailer. My new roof ac uses only 515 watts. The reason I had tried this fan, was because I believed and still do that the fantastic fans at $269 are quite a rip off. I think the whole house fan was around $69. Below you will see my newer fan, it is also the same size 14 inch fan. It is rated to be able to move 2000 CFM. If you want to translate to 12 volt - your looking at about 6+ amps, quite low as the 3" a/c blower uses 2.7 amps.


The new fan is very quiet and you can sleep right through the night with the fan running on high if you so desired, very quiet.


Out with the old 


In with the new fan , 3 speed, 2000 CFM
has 3 speed adjustment-
and best only uses 50 watts.
Cost was about $49

Yes I tested it - because seeing is believing for me


This is the box on the larger 18" model that I purchased by accident,
The demo model was 14" but all floor models in the box were 18"
I tested it & it only used about 75 watts @ 4000 CFM

Ultimate Hacking Guide for portable AC Part 2

        Okay now here we go with my grand experiment. Since I'm only bata testing the concept and pushing the envelope a little bit further from Shadow catchers design, so please don't give me any comments about how ugly this looks.  I am using a small 5,000 BTU air conditioner. The weight of the whole unit is about 40 pounds approximately. Since I'm not into pulling the unit in and out - then in and out again all the time while camping I decided it would be much better to be mounted on the roof. In addition it's a well-known fact that air conditioning works much better if it's sucking hot air from the top and also blowing back the cold air from the top so it can settle down to the lower areas. The AC in my case is being installed directly above my raised queen size bed. I could also hang a curtain and close off the area above the bed for supper extra cooling, as you will see you later with the thermostat below. I  now have a choice of cooling off a 2' x 5' x 6' square area, or the entire 7' x 16' cargo trailer. If it gets above 90 Deg on the exterior I can now hide out in my own private little cooling cocoon.


Here is the first look - not my favorite, but its just for testing :-)


I made a metal and foam wrapped box - 3" vents


The inside of the box


This is the blower to improve the air flow & performance
it really makes a difference, so don't leave this part out


Remember the times I was scared to cut holes in the trailer roof 


This is a 4" deck plate cost about $13 - 1 have 2 of them so the 
ac can be removed in the winter time


All sealed and water tight for the winter season


Waiting for this part to arrive in 2- 3 weeks to reduce the fan noise and speed,
this was not available from local electronic stores :-(


Here is the final result, the exterior temp was up to 92 deg F
its now 6:24 pm 
Temperature directly above my bed was 58 deg F
The 28 is temp inside the cooler

Can you say cold as in a Meat Locker :-)


Stay tuned for part 3 - the 7,000 Btu LG


Sunday, July 29, 2012

Ultimate Hacking Guide for portable AC Part 1

         Anyone following my blog knows that I don't really like the heat. One of the items that I had planed for in the trailer and the reason for the large 840 watt of solar panels was for a smaller air conditioning unit that would be able to run off of the solar. However because I just assumed millions of these ACs were manufactured by great companies like LG - that the unit would be operational, but I was sadly disappointed. Really since the start of the project I have been looking around for alternatives to provide air-conditioning for the trailer. Looking around I have seen some people that have come up with some really great ideas on how to turn smaller air conditioners for other purposes, then their standard uses - therefore the title hacking an AC. Below is the first link where you can get more detailed info. I will also post some of the pictures here, but for now many thanks to Shadow Catcher and his great work. Please go see his complete link below.


http://www.tnttt.com/viewtopic.php?f=30&t=44561&hilit=Hacking+a


AC Hacking a Figidaire 5000 BTU


By Shadow Catcher » Fri Jun 10, 2011 6:36 am


I just completed the adaptation of a 5,000 BTU Frigidaire to work with Compass Rose. This was actually a very inexpensive process as I used a close out Frigidaire 5000 BTU that I picked up end of season at Lowes for $50. I had an adapter made to handle a 4 inch ducts by one of the local heating and air conditioning contractors. I had originally thought of using a rather fancy digital thermostat but found that making it play well with the air conditioner was not going well, plus every time it was unplugged I would lose all the settings. What I ended up doing was pulling the thermostat out of the AC unit and mounting it and on off switch in a RadioShack project box. 

Wiring is very simple because with a thermostat all I'm doing is looking into the existing wires that control the AC unit, and the power switch basically interrupts the off, cool, fan speed switch. 

I figured that the unit would be on high cool all the time, or off as I am pushing air through 4 inch flex duct. Control wires are connected using Anderson power poles and run through the air intake duct. 
The ducts run through four-inch Marine deck plates in the side of the trailer. 


I ended up having a serious problem with the initial set up and that was icing and the discussion of that is much later in the responses on page 3. The solution however was quite simple, I added in a 4" marine bilge blower rated a 240 CFM and this has taken care of the problem. The pictures are at what 
is currently the bottom of this first posting. I do need to refine how this goes together and I will edit the final solution. My feeling is that I can reduce the speed of the blower and the noise produced and now that I know that it works shorten hose and route wires neatly and efficiently. 


This is the electrical guts, VERY simple, Note the absence of the thermostat.


I found a second link from the same forum by Don 
who converted a single hose unit into a 2 hose unit. 
Please visit his link below for more info.


Don used a cake pan for his simple conversion


Now stay tuned for my solutions, as my trailer is much bigger - 
and I am trying hard to mostly stay with solar.....
the solution is also a little more complicated , who would have thought ?


Saturday, July 14, 2012

Fwd: fraziersutube sent you a video: "SPINIFEX Caravans - TRUE Off Roader Caravans"


Here Is a really great Video for an off road trailer. It was sent to be by a friend.
 
fraziersutube has shared a video with you on YouTube:
© 2012 YouTube, LLC
901 Cherry Ave, San Bruno, CA 94066