Sunday, April 29, 2012

Water is finally coming

         It's been quite a while since the start of my project, but finally I have begun to make all of the water connections. So far I have set up the system so that the cold water now runs from my house hose. The 2 x 40 gallon interior water tanks are also ready to be connected and to be filled with water. The 12V - 3 GPM  water pump has now been installed and connected to the electric system. My final water connection coming soon will be the hot connection to the endless water heater. I have been switching between snap together PEX connectors and brass fittings which are clamped on with a special tool. If you like the compression ring - I would strongly recommend you get the one handed tool. After that is completed, I will try to connect the propane for the water heater. That should be lots of fun since I purchased the parts about a year ago and I hope I can find everything that I need to make the gas connection. 


Here is the underside of the faucet, it was a MAJOR - PIA 
to connect as in total there were 11 connections, would you believe it ? 
All connections were made reaching sideways 18" into a 4" 
space behind the shower fixture wall that allows
all the pipes etc.


Here is the faucet, I got this because of the almost 6ft long metal sprayer
the faucet is rated at 1.7 GPM - supper low flow


Here are some snap or push together connectors for PEX & copper


The connectors for the water pump


The underside with brass connectors & the end cap 
allowing me to test the system


The 2nd under the trailer shut off valve / hose bib


Close up of the brass connectors & metal band clamps


The connection to the front water tank


Here is the planned reverse osmoses water filter & and 2nd tank


Top of the tank and inspection cover


4 Cabinet door locks


Cabinet locks magnet used to open doors
in the right spot they stick to the wood


Interior view of the cabinet locks


2 locks yet to be installed


The 10 year smoke alarm 
it has a battery 4 x regular size


On my next trip I will also get this alarm for explosive gas


Thursday, April 26, 2012

Problems with LED lights

        Okay here is the lesson, never believe what you read on the manufacturers label. The package on the left is the $35 LED dimmable bulb. The green package on the right is the $30 non-dimmable bulb. Today I also decided to test the power usage. As soon as I got the package unwrapped I already ran into problems. So here we go with all my problems !


The $35 dimmable bulb - never got tested


Problem can you see the difference already ?
The dimmable bulb on the right is fatter and does
not fit inside the fixture , Grrrrrr !


Not very professional for a $35 bulb
The dimmable bulb on the right is fatter and does
not fit inside the fixture , Grrrrrr !


The power output of the fixture on high was about 18 watts,
that includes my TV at about 5 watts.
As I turned the power down on the dimmer -
the watts did not decrease,
so maybe that is what they mean with non dimmable ?


These little rechargeable  LED lights were also using a few watts
maybe 2-3 watts each


Not to bad for 2 lights and the TV in the off position 9 watts
vampire load on my system


Here is the reading from the 2 standard 50 watt bulbs - 20 for TV and 2 above lights 
is equal to 60 watts, but the reading should be 120 watts.
So again you can see 2 x 50 watt halogen are only using 60 watts,
what is up with that ?


Maybe this reading is really .81 amps x 120 volts ?
that would put it at about 97 watts -
much closer to the 100 watts 2 bulbs should use ?


The thing that I did notice however was that my dimmer switch
 did reduce the power of the 50 watt halogen on what almost looked like a 1 to 1 ratio,
as the light also goes down, but at least some good news

Tuesday, April 24, 2012

12v outlet & water screen progress

      Well I can report back the $40 drill shown below works supper great and cut the hole smooth as silk. I had a little bit of a "bitch of a time" trying to find my heat gun to install the PEX ? But with 2 try's and a pot of boiling water I was able to jamb the fitting into the pipe, thank god !


12V outlet is installed on the rear
above the license plate light, it will be switched from
the interior so "NO freeloaders are welcome"


With boiling hot water and 2 try's I was able to jam 
the fitting into the 3/4" PEX pipe,
will also use metal band clamp to secure PEX


It was still about 80 outside so I knocked off early

Low power interior LED lights and a new drill bit

          Here is the new bulb that I purchased at Lowe's. These lights look the same as 50 watt other bulbs, but are said to be rated as the 35 watt. The package says these are not dimmable, however I was able to get them to dim. I would guess from 30% to 100% , they did not dim below that level. I will report back in a few days how they look at night, which is the real test for me. 


          Fast forward: Well I checked them at night and they were great, but the 1 LED did not allow the other 3 regular bulbs on the same dimmer circuit to dim below 20% maybe. The good thing about the LED light was that it was instant on vs. the other bulbs were slightly delayed .5 to 1 sec maybe ? In conclusion I can tell you that 4 lights at 3.5 watts each ( 15 watts total ) will have you wearing sun glasses at night in bed, everything was way supper bright. The trailer could well get by on just 2 lights if needed. So that is a great drop vs 200 watts before - however the regular lights also work as a heater  when its cold 200 watts is also 600+ Btu heat value.


 The top picture is in the dimmed position


Bottom lights on full brightness
appears to be the other way around


Here is the package


The bulb close up, i'm not sure its a good investment as when
the other bulbs are dimmed, they are said to also use less power,
but then one also gets less light. Cost of each bulb is $30 vs $5....
But for trailer this may be a good deal with the need for a smaller solar system. 
Also when its hot, it will make less heat.
150 Btu vs 15 Btu heat output 


Here is new drill, mostly for drilling into metal cabinets.


Monday, April 23, 2012

A little new plumbing - almost stealth hose bib & exterior 12V plug

      Here we go with the exterior hose bib. This was not an easy project the rear has a double metal skin and is not easy to drill through. Three-quarter inch copper female allowed me to connect the brass male hose bib together. Then in the corner you can see the 3/4 Shark Bite. Event with some shims it was difficult to get the pipe as tight as I would liked to have had it. I had to use some extra pipe straps to tighten it up to where I was sorta happy. 


Here is the exterior view without the handle
I like it because its really small
im thinking to paint handle white to make it more invisible


View with the handle water on


View with the handle water off


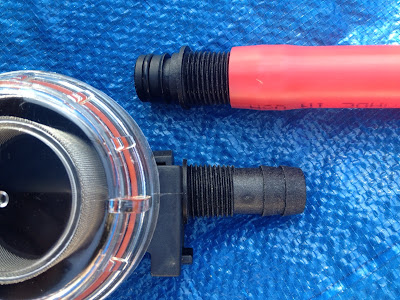
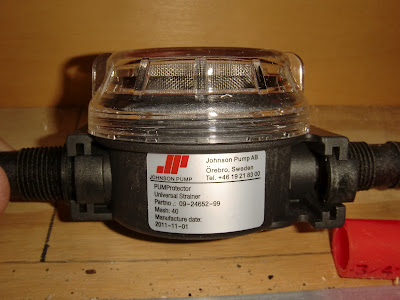
I found an in line filter that I liked


Here is filter with top closed


Also found 2nd smaller filter & smaller screen


Finally I found a cool exterior 12V water tight outlet only $10


But I'm worn out from drilling the first hole through 
2 layers of metal and broke 1 drill bit in the process


Hopefully tomorrow I will have a little more time ?

Sunday, April 22, 2012

Closer view of the solar goodies unpacked

Here are the packages as found in the store. See picture # 5 and 6 below for the panels. The items are laying on my rear cargo door that had been carpeted. I discovered the carpet in full sunlight gets very , very HOT !!  ouch ........


The speakers, two or more can be connected and they have internal batteries 
to power the speakers which can be charged with the little solar panel,
or a USB cable 


The  16 oz - 12 volt - 25 watt thermos


My iPhone inside the speakers
it can then be zipped up to look like picture above


The solar panels from picture 1 above


A little pocket to store the battery pack

Starting plumbing for the water tanks

     Well here we are again today finally getting started on the plumbing on the rear 37 or 40 gallon water tanks on the back end. As always I like to try out some new materials, plumbing parts and other knick knacks that I've never tried out before. One of my goals is to be able to quickly isolate any of the components that may need to be repaired or removed for service. Some parts of the trailer I like to have exposed, so that people who come to visit can see exactly how those parts fit together, also if there is a leak then I will be the first to see the problem.


Here is the shut off valve & a 3/4 x 3/4 x 3/4" Gator bite
I love these as the pipe just snaps together
and can come apart just as easy.


Here is the  3/4 x 3/4"  90  deg Gator bite
I love these as the pipe just snaps together
and can come apart just as easy.


Here is the blue and white valve above.


I'm thinking about installing water valves / hose bibs on or under the trailer
The top valve may be great for the rear door area
as it only sticks out 1.5" and the handle
can easily be removed.


See this handle is so easy to remove.


I'm thinking about this location at the passenger side corner
painted white or black you may not even notice this ?